Other Natural Building Projects:
Cob in the Kitchen! July 2013
Sherman Middle School - Madison, WI

The students & community of Sherman Middle School and I spent one month designing & sculpting a 15-foot wall using cob & locally-salvaged materials! The project was steady, sweaty and really wonderful, and together we created a long-lasting element of beauty and definition in their outdoor kitchen space.
Read what the local newspaper had to say about us:
http://www.thedailypage.com/daily/article.php?article=40543
Watch a time-lapse video of the project here:
Read what the local newspaper had to say about us:
http://www.thedailypage.com/daily/article.php?article=40543
Watch a time-lapse video of the project here:
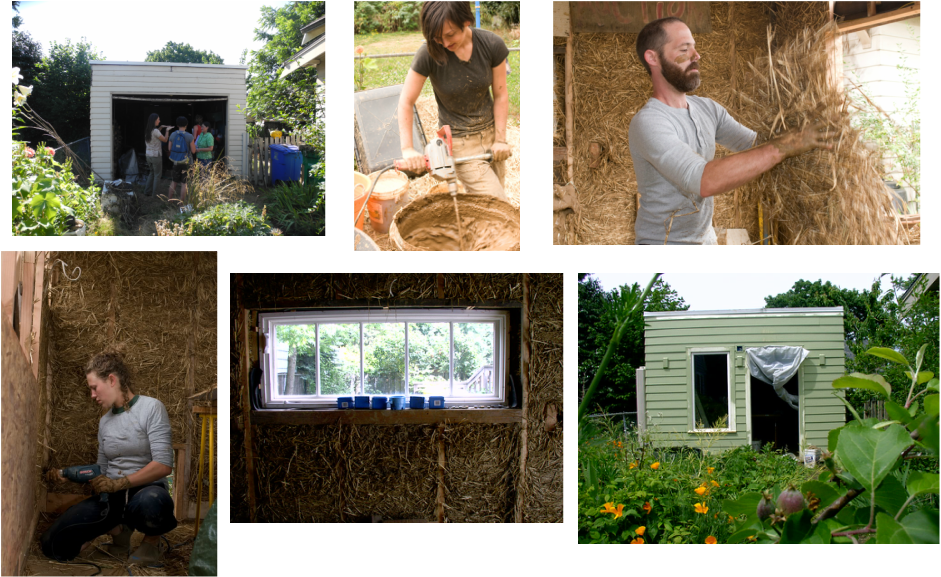
Light Straw-Clay Retrofit Portland, OR Summer 2011
Homeowner Christy was interested in transforming her underutilized detached garage into a naturally-insulated living space. My co-builder, Wolfgang, and I deconstructed the garage, widened the wall studs, and added door and window frames. Then, with the help of many eager hands, we packed the newly-widened wall cavities with loads of light straw-clay mix. After the new insulation dried, we inserted the windows (recycled), added plywood and vapor barriers and attached new siding.
Salmon Gazebo Summer 2010
Portland Community College - Portland, OR
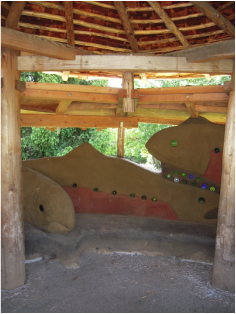
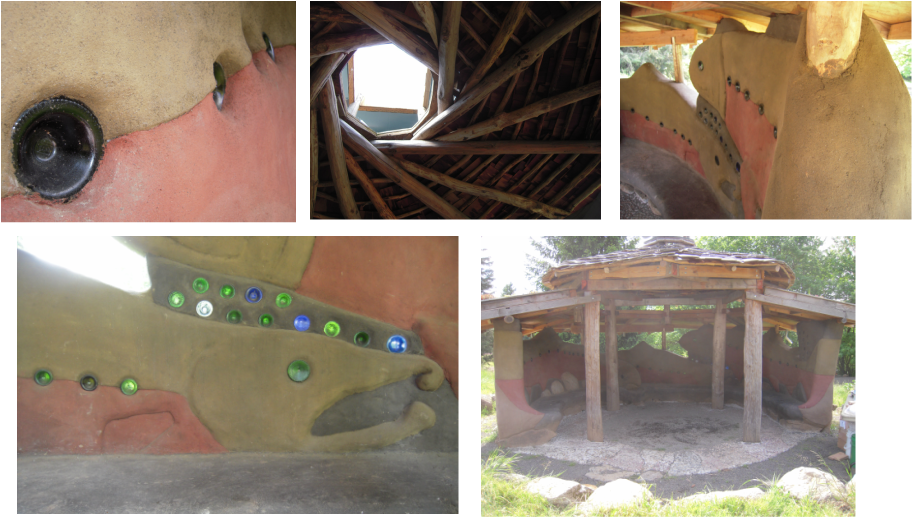
A reciprocating planted roof, recycled wine bottles, rain barrels to store roof water, and three cob salmon seven feet long to rest your back on...
This was one of my first experiences building with cob, and here I had the opportunity to work & learn from a fantastic natural builder and friend, Bernhard Masterson.
This project was erected in the Learning Garden of Portland Community College. The staff members organizing this project were great, enthusiastic people to work with and helped bring in many hands to complete this functional work of art.
Cool Box - Cob Cottage Company, OR
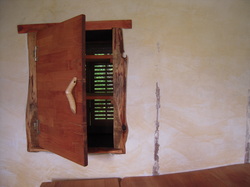
A built-in, natural refrigerator of sorts.
A wooden frame was built into the north wall of a cob building. Once the wall was dry, we added screen to the exterior side of the frame and a recycled window shutter for insect-proof ventilation to the outdoors. We then added shelving and a door & frame of salvaged wood scrap on the interior. I love the way it turned out!
Building these ventilated boxes into the north sides of buildings keeps food cool for days and doesn't take up any room space.
Plaster Repair - Cob Cottage Company, OR

Electrical lines were added to an already existing cob building, so much cob and natural plaster was torn out and needed to be redone. My work consisted of applying three differing and very fine lime plaster layers onto the new cob to rebuild the height, texture and color.
3 Little Pigs! Experiment in Natural Insulation - Madison, WI
One of Straw, one of Wood, one of Bricks...
Which will prevail?
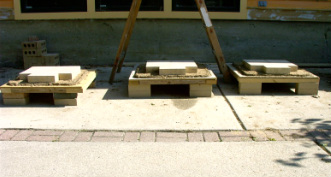
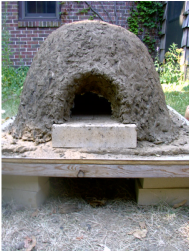
Platforms for the three mini-ovens
I have heard and read of various natural materials used to insulate wood-fired ovens, and the question I have is "Which one is best?" Thus, I am embarking on...
The "Three Little Pigs" Experiment
Purpose:
To create a better insulated oven with the most re-purposed material and the least environmental impact.
Process:
Create three miniature cob ovens, identical in size and thermal layers, but differing in insulating layers.
1. Cob & Straw
2. Cob & Wood (veeery tiny wood, a.k.a. sawdust)
3. Cob & Bricks**
**Originally I planned to use recycled masonry bricks, and they turned out to be too long and awkward for this small, round oven. I decided to use woodchips instead.
Factors to observe & measure:
-Accessibility of materials (Expenses, distance traveled to acquire materials)
-Ease & timeliness of construction
-Insulative value (Temperature comparisons)
There will be no huffing and puffing, just squishing and mixing, heating and munching!
Straw Oven
Insulation Mix: .5 part Clay, 1.5 parts Sand, Straw to taste
3" layer
Construction Observations: This mix was the most time/energy consuming to prepare for me. On the flip-side, it is a foot-friendly procedure and is nice to smush around in. It slumped a bit when applied, but no big problem there. All the sand makes it heavy!
3" layer
Construction Observations: This mix was the most time/energy consuming to prepare for me. On the flip-side, it is a foot-friendly procedure and is nice to smush around in. It slumped a bit when applied, but no big problem there. All the sand makes it heavy!
Sawdust Oven
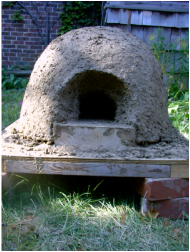
Insulation Mix: 3 parts Sawdust (& scattered pine needles), 2.5 parts Clay Slip
3" layer
Construction Observations: What a cool texture! Light & sponge-like.
To create the clay slip, I let a bucket of chunky, dry clay soak in water overnight and stirred it until smooth the next day. this layer was easy to mix in a wheelbarrow and apply. It is best applied all at once to avoid layer cracks. Once this oven dried, however, this layer shrunk up and cracked significantly anyway! Some cracks went almost all the way around the oven and were about 1/2 a centimeter wide. I re-wet the area and filled in the cracks with more material...it seems fine now. I bet having more sawdust/less clay in the mix would have resulted in less cracking/shrinkage.
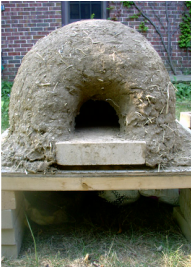
Woodchip Oven (brick oven exceeded size-parameter of this experiment, so I chose two types of wood insulation instead)
Insulation Mix: 1.75 parts Woodchips (.5-2.5" in length), 1.5 parts Clay Slip
3" layer
Construction Observations: This is my first time working with woodchips & cob.
Once the clay slip was soaked and well-stirred, the mix was then easy to prepare in a wheelbarrow, easy to apply, and because the texture is so rough there was no slumping of the material. Nice.
When working with your hands, watch out for pokey woodchips! It seems to be drying nice- no significant cracking thus far.
